I’ve been meaning to make one of these since I saw this.
A night on ebay searching out a working film camera since my 2006 Canon decided to stop working just in time for my Photo III class! I ended up scoring a beautiful Canon TX in great condition with 3 Canon lenses (a 50mm 1:1.8 S.C., a 35 mm 1:3.5 S.C., and a 135mm 1:2.5), a flash, 3 filters, shutter cable release and lens cases…

aaaaand an “as is” vintage Kodak.
The vintage Kodak is what pushed me to finally make the lightbox. This thing is beautiful.
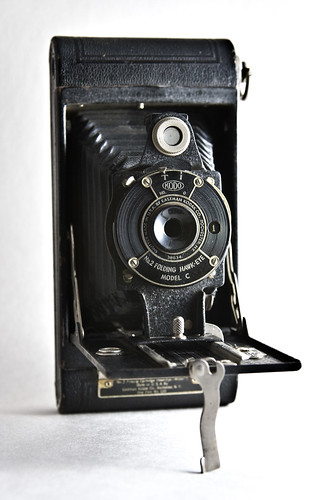
I haven’t stopped looking at it since it came Saturday morning. It appears to be fully functional. It’s medium-format, takes 120 film and has four apertures, which from what I’ve read is rare for affordable cameras in the 20s like this one. I read somewhere (and apparently forgot to bookmark the link?) that the Hawk-Eye cameras were originally made by Boston Camera Company, who was bought out, and then bought out again by Eastman Kodak.

I believe the bellows were replaced because they shouldn’t be in such good condition.
ANYWAY! The light box!
You’ll need:
A 12x12x12 box
Tracing or gift tissue paper (white). You could chop up a shower curtain, too.
Masking or gaffer’s tape
Box cutter
First Aid (just in case)
These photos should make the process pretty easy on you. You’re basically tipping the box (with the bottom tapes and the top flaps open) on it’s side, open end facing you. Cut off the top and bottom flap so only the left and right remain. These will be used to keep the light from spilling into your lens.
Now cut a large window into the top and left and right side of the box. Tape the diffuser material you chose (tracing paper, etc) over the windows. Finally, hang a piece of cut posterboard (cut it to fit your box) from the top to make a seamless background.


Now you can use daylight, flash (off camera), or simple lamps (but be sure to set your white balance to the bulb temperature, or shoot RAW) to play with the direction of light. Experiment with different colored backdrops and sliding black posterboard window-blockers on one side to get a dramatic side light with no reflection.

If you look at these two photos, you can see the difference moving the light makes:
Side lit:

Top lit:
For my knitting readers (waves), your stash and projects look great in these, and it can be done outside in the sun with a point and shoot camera (turn the flash off, set to sun/daylight).

Etsy sellers, collectors, ebayers…all have a great excuse to use one of these so give it a shot! And if you do, leave me a comment so I can see how you made out!


